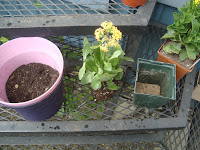
Here in Chapter 3 I shall now show what kind of pots and dirt Kalanchoe receive when they arrive at my house.
As mentions in chapter 1, Kalanchoe like a specific kind of dirt. They like a light, well draining dirt like Pearlite with either a wee bit of sand or Fine gravel mixed in. I know you can buy specialty "Cactus Mix" dirt which is generally recommended but I seldom buy what I can make.
My mom usually has lots of Pearlite type dirt left over from commercial bedding plants that didn't manage to find their way to the flower bed, so I usually snag a little for my Flaming Katy.
begin with Prepping the pot. You need to place enough gravel (or really coarse sand or what-have-you that drains well) to thoroughly cover the bottom of your chosen pot. About 1/2 an inch is sufficient.
Next, let's attend to the dirt.
Along with the previously mentioned commercial potting soil or Pearlite mix, I like to add somewhere around equal part of the same gravel but perhaps a little finer, just no really big pebbles. To this, l like to add somewhere around one part of plain old garden grade black dirt.
It should look like this. I always end up making more than what I need for one plant but I'd rather have too much than not enough.
Why do this you ask when the name of the game is "Light Soil"?
Because I find that when you let the Kalanchoe's dirt dry out to the recommended point, they're bouncing around in their pots like ping-pong balls because the straight Pearlite dirt shrinks up really badly. I honestly would worry about them falling right out of their pots or worse, their Roots getting exposed to all kinds of nasty things!
By adding some fine gravel, we still maintain a well draining soil but with the black dirt, we add stability, grater nutrient retention and reduced risk of shrinking.
Bonus point: If you take dirt from your Bean plant patch as I do, you add a little Nitrogen to their dirt for extra measure. ;)
Now I know I read somewhere that Kalanchoe don't mind a little bit of Root Binding, where the roots begin to grow in mass around the limits of their pot from being their too long but I think this little fellow needs a tune up. Besides, giving it new dirt will allow for more healthy growth up above.
I usually will knock off as much loose soil as I can (don't waste that) without damaging the root system, test to see how much dirt I need to bring up the base of the plant to just under the lip of it's new pot and fill accordingly.
Once the bottom has been filled, just continue to add dirt around the sides of the pot, tamping or packing as you go until you have a nice and snug but not suffocating fit all the way around. Remember, we want as much dirt in there as we can to avoid excess shrinking.
Suffice to say that making sure your plant is properly centered in it's new pot will make for less risk of tipping over as it grows.
After all that, you need to give it a little drink of water, at least enough to help fill in any air bubbles that could harm their roots if left unchecked.
Note: Make sure that the dirt for your plant is not level with the pot. You want it around 1/4 to 1/3 an inch under pot level. This can pretty much be achieved with proper packing of the dirt all around the edges. Trust me, it makes what little watering you do a LOT easier!
TA-DA! One new potted plant ready for anything!... except frost. XD
This fella is going to be sitting in the shade for a wee bit since it's probably spent the better part of it's life without real sunlight. Don't want to burn those lovely leaves.
As always, Thanks for reading and I hope this helped.
Later! A.M.


Another good post, but most growers now will take exception to a layer of gravel on the bottom. This is due to the "perched water table" phenomenon. Read the first post here for a good explanation of that:
ReplyDeletehttp://davesgarden.com/community/forums/t/719569/